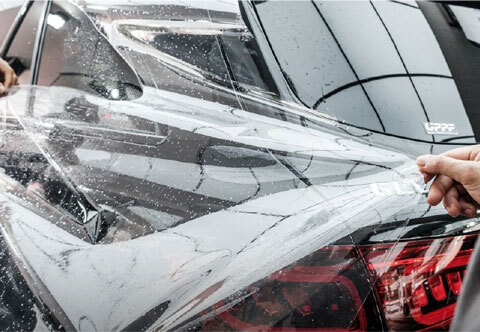
Introduction
Protecting your car’s paint with Paint Protection Film (PPF) is one of the smartest investments for long-term vehicle care. Whether you’re attempting a DIY PPF installation at home or hiring a PPF installer near me for a professional job, knowing the correct process is essential for flawless results. This step-by-step guide shows you how to apply PPF like a pro, from surface preparation to final curing, so your car gets seamless, durable protection that looks amazing for years.

What You’ll Need
Before you start, make sure you have the right paint protection film tools and materials on hand. Using a complete PPF installation kit can make the process easier, especially for first-time installers. A dust-free room during the PPF installation is a must.
Essential tools and materials:
High-quality TPU PPF (like UPPF’s self-healing PPF)
Slip solution (PPF installation solution) – distilled water + baby shampoo or a dedicated PPF slip mix
Tack solution – distilled water without soap
A wax-free, automotive-specific cleaner
Two spray bottles (labeled “Slip” and “Tack”)
PPF squeegee (soft-edge)
Heat gun or infrared curing lamp
Microfiber towels
Nitrile gloves
Clay bar or iron remover
Precision knife or cutting blade
Adequate lighting setup
💡 Tip: Many pro shops and online retailers sell pre-assembled PPF installation kits that include the film, squeegee, and solutions you’ll need.
Check out UPPF’s installation tools.
Step 1: Wash & Decontaminate the Vehicle
Start by thoroughly cleaning the car:
1. Wash with a PH-neutral automotive shampoo.
2. Clay bar the surface or use iron remover to eliminate embedded contaminants.
3. Dry the car completely with a clean microfiber tower.
4. Wipe down the panels using the automotive specific cleaner to remove any wax, sealants, or oils.
Tip: Any contamination left on the surface will be sealed under the film, affecting its appearance and performance.
Step 2: Prepare the film
You can use:
-Pre-cut PPF kits, often available for specific car models, or
-Bulk rolls that need manual trimming
If using UPPF’s professional kits, make sure each piece aligns with the panel it is designed for before peeling the backing.
Step 3: Spray Slip Solution
Spray the slip solution generously on:
-The vehicle panel, and
-The adhesive side of the PPF
This allows the film to float and be repositioned on the panel without immediately sticking.
NOTE: Slip Solution Ratio
Step 4: Lay the Film
Carefully place the film on the wet surface and align it using body lines or emblems as guides. UPPF’s TPU films offer flexibility and optical clarity, making alignment easier.
Tips: Don’t stretch the film unless absolutely necessary-stretching may lead to distortion or lifted lines over time.
Step 5: Squeegee the Film
Start at the center of the panel:
-Use your soft-edge squeegee to push the slip solution outward
-Switch to tack solution near edges and curves to help lock the film in place.
-Use overlapping strokes and wipe the squeegee frequently
-Avoid trapping air bubbles-use firm, consistent pressure.
Step 6: Heat and Tuck the Edges
Use a heat gun or infrared lamp to:
-Activate self-healing properties
-Help the film conform to curves
-Eliminate minor creases or stretch marks
Carefully tuck the film around edges, behind seals, or into panel gaps using a glove or plastic tool.
Step 7: Inspect and Trim
Inspect for:
-Air bubbles
-Lifted edges
-Dirt or contaminants under the film
Trim excess film with a precision knife, if necessary. Be cautious not to score the paint.
Step 8: Allow Curing Time
Let the firm cure indoors for at least 12-48 hours, depending on the climate and humidity. Avoid:
-Washing the vehicle
-Parking under harsh sunlight
-Driving in heavy rain or dusty conditions
Bonus Tips for Professional Results
-Always install in a clean, temperature-controlled space
-Wear gloves to prevent fingerprints or contamination
-Use bright, angled lighting to spot imperfections early
-Start with flat panels (like the hood) before attempting complex areas like bumpers or mirrors.
Why Choose UPPF for Your Paint Protection Film?
At UPPF, we use aliphatic TPU-based film technology engineered for:
-Self-healing performance
-Hydrophobic surface that repels dirt and water
-UV resistance for long-term clarity
-No residual glue left upon removal
-Available in clear and colored finishes for custom styling
Final Thoughts
Installing PPF correctly takes patience, precision, and the right tools. If you’re confident in your skills, this DIY PPF installation guide will help you achieve results close to a professional’s. For complex vehicles or if you’re short on time, searching for a certified PPF installer near me ensures a perfect fit and finish.
